Level Design
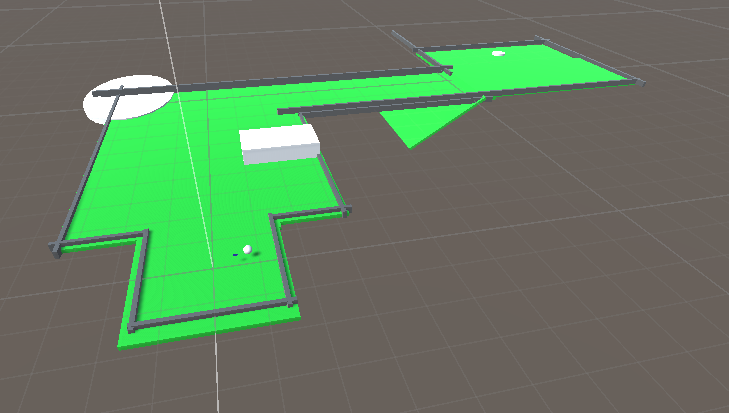
I grey Boxed my levels in preparation for adding in the rest of the graphic, this allowed me to get a sense of the size of my levels and play test them to make sure they worked as intended before starting to add in further elements such as graphics and sound. I translated my level design plans into 3d and tried to keep the scale of everything as I had in my plans. I decided not the grey box the out of bounds areas because it would be better to spend my time focusing on the actual playable area and because I had not fully planned out the position of them so I will create the out of bounds area when I implement my graphics. I made sure each level was possible to complete and currently have not changed any of the properties of my ball as it still works well however most likely change it further over the course of the production until I get it as good as I can. Since I designed my courses with my behind the ball camera in mind it was no surprise that the camera worked with my course layout however like the balls properties it is something I will change over the course of the project since currently but currently it is still a good base for me to build on. After testing the only thing I changed was the trap holes on hole 3 as I liked them but decided something more forgiving might work better so put cylinders around that area to obstruct the players path and I found them to work better and so I will use them instead, similarly to other areas I will adapt my holes over the course of the project so that I can put all of my knowledge about what makes a good golf course that I learnt from my research to use so that I can create an enjoyable golf experience for the player.
Mechanics


In order to create my power meter, directional arrow and stroke count I was given a asset pack containing the required scripts and prefabs, After I added the required scripts and prefabs into my game I then checked if the power meter, directional arrow and stroke count would work in my grey boxed levels which they did. These were the main mechanics of a good golf game so it was important that I implement them into my own game as without them my game wouldn’t be enjoyable for players as they wouldn’t be able to tell how hard they are hitting the ball or what direction it was going or how many shots they had taken. I then used these to create a temporary makeshift camera angle mock up I find a better way to make the camera follow the ball which I first did by making the camera a child of the ball however that caused the camera to roll with the ball which was quite disorienting so I then changed it to make it a child of the directional arrow as it would still follow the ball but wouldn’t roll with it.
As can be seen during the planning phase there were other mechanics I would have liked to have added however given the time frame and my lack of knowledge on how to add them since it would have been my first time using bolt to code these mechanics, while I believe I could have created at least one new mechanic to add to my game it would have meant I would have had less time to spend on other more important areas such as making sure the core gameplay is enjoyable hence why I decided against adding more mechanics since in my fmp last year I think I added to many mechanics to my game as while they were a good addition to the experience I believe it would have probably been a better use of my time to just use the core gameplay I had to create a second level to further demonstrate that core gameplay.
Collecting Assets


Before I could start implementing my graphics I had to obtain them whether that be creating them myself or finding some premade assets, Due to my lack of experience utilizing Maya I decided to use preexisting assets for most of my assets since they would look better than what I could have made and it would save me a lot of time that would be needed for other aspects of the game such as sound. I decided to collect assets in order of what I would need for each level so I started by looking for environmental assets such as rocks and trees, I ended up finding a polygonal foliage asset pack that had everything I needed and more. With what looked like my main collection of assets found I then moved onto a town asset pack for my first level which I found however it wasn’t looked quite a bit more detailed than my foliage but due to it being only background decoration that the player wouldn’t fully see it would still work well for my level. The last asset I needed for my first level was a pirate ship which once again was an easy find however similarly to my town assets it was more detailed than the rest however it wouldn’t affect the consistency of my assets since it was quite far from the main area and was a background decoration. I then moved onto my next level which would mainly rely on the foliage asset pack I had already gathered but I needed a bridge for it so I set out looking for one and found a rather nice brick bridge however it would look quite out of place but I decided to try it since I could always add one of my own materials onto it to make it fit in with my other assets and so I tried that and found that it worked really well and fit in with the rest of my assets quite well. Lastly I moved onto collecting assets for my final level which would need some ruins which took some time to find since it was quite hard to find some that fit the style of my game however eventually I found an asset pack that I could use, I then moved onto to my final asset which would be some gold coins which were very easy to find.
Creating Assets
I created the tunnel for my third level in maya since it is something simple enough that I could create myself, I did so by creating a cube and then making it bigger and then did the same for a cylinder until it was about the size I wanted for my tunnel. Next I selected both shapes and then used the difference Boolean to cut the cylinder out of the cube, since my shape was finished I then exported it as an fbx and then imported it into unity and scaled it up since it was slightly smaller than what I needed, then placed it at the end of my final hole and applied the rock material I had been using for that hole.


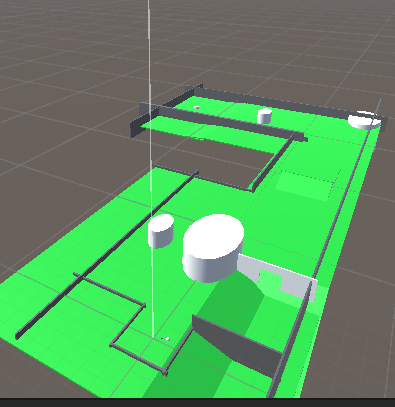
Level 1 Graphics


I added the graphics into my first level, I did this by importing the asset packs I had found from the unity store into unity. Next I expanded the floor of my level since when grey boxing I only created the playable area however I had to make new materials for the ocean and beach areas which was very easy to do since I had already learnt how to make materials when creating my simple prototype. After having creating the terrain I then started to add the assets I had chosen to create my environment, first I added the pirate ship since that would help me in scaling the size of the rest of the assets into the water and then shrank it down since its default scale was way too big. After that I started to create the forest area around the playable area using rocks and trees after adding the models I then dragged their textures on from the asset pack and then copy and pasted them so I would not have to repeat the process of adding the textures, I then added some tree stumps, flowers and logs around to further decorate the area. Next I added the town on the beach area using the medieval town asset pack I found luckily this time the models were prefabs so they already had the textures applied so all I had to do was scale them up since they were very small by default. I then went about using these assets to replace the grey boxed obstacles on my playable area by adding the barrels and crates seen on my level plan and then swapping the corner piece for a big rock however after testing the level I found that the rock didn’t have any collisions so I had to add some myself by adding a mesh collider component to the model. Lastly I added some cliff walls around the area so that the player couldn’t see the abyss of nothing that surrounded the area. Adding the graphics for my first level was very easy and I really enjoyed it, luckily what little issues I did have were easy to fix. Throughout the construction of this level and future levels I make sure to create empties so that I can group up sets of assets to make my hierarchy easier to navigate for myself.
Level 2 Graphics


Next I added the graphics into my second level, for any assets previously used in my first level I was sure to make them the same size to make sure my game was consistent. Once again I followed my plan and I started with the out of bounds area by adding in trees, rocks, logs and flowers to the surrounding area there are a lot more trees due to this being set deep in the forest. Next I went to adding in my assets to the playable area which I did by first replacing my grey box obstacles with the rocks or tree’s like I said I would in my plan I also added a massive tree into the man rock in the starting area since it made the starting area to be covered in shade which I liked the look of. Next I used the cliff 3 asset to make a tunnel which originally was going to be through a tree stump but I decided since I already had this asset I might as well make use of it. Lastly added in the bridge and then resized it since it was very small by default I then decided to change the material to the same as the walls used to define the playable area. Adding the graphics for my first level was very easy and I really enjoyed it, After learning from the first hole I encountered no issues. Throughout the construction of this level and future levels I make sure to create empties so that I can group up sets of assets to make my hierarchy easier to navigate for myself.
Level 3 Graphics


Lastly I added my graphics into my third level. Since its indoors I started by creating the cave that the level is set in to help me with scale for the rest of my objects, I then added in the obstacles such as ruins, rocks, ramp and gold coins which all had to be scaled up since they were too small. Since the scenery is absent from this level since it takes place within a very plain cave that greatly contrasts the previous two levels and helps show that you are at the end of your journey. While adding the graphics to this level I had to add a penalty for hitting the water so I put a trigger box on top of the water that reset the level if the player touches it. After learning from the first hole I encountered no issues, once again I had no problems creating this and due to it being the most simple it was the easiest and quickest to create. Throughout the construction of this level and future levels I make sure to create empties so that I can group up sets of assets to make my hierarchy easier to navigate for myself.
Overall I really enjoyed adding the graphics into my game and so far it has been my favorite aspect of production, despite how I have finished each level I will make needed changes based on feedback from testing and may add further details into the level environment if I have some spare time later in the project and have nothing more important to spend my time doing.
Changing the ball colour


After having added my graphics I decided to change the balls colour, I ended up choosing purple since it made the ball stand out from its surroundings and while white did that too I wanted something more unique. In order to change its colour I had to make a new material like I had learnt earlier and then apply it to the ball which was really easy to do and I had no issues doing so.
Exporting


Next I exported my game to my itch page which I did by going into the build settings and changing the platform to WebGL and then pressing build and run, next I created a folder called exports and another folder in that called v.0.65 since I’m just past the half way point of my game. After the export was finished I created a compressed zip file so that I could upload it to itch. I then set the viewport to double the default size so that the unity fullscreen button was accessible and then tested my game to make sure it worked.
UI Font
Next I updated the font used in my UI to be more unique and better fit with my theme, I did so by downloading the font I wanted as a compressed zip file and then uncompressed it and importing it into unity. I then put it in a font folder and dragged it into the font in the inspector for my stroke count.

Updated Production Schedule
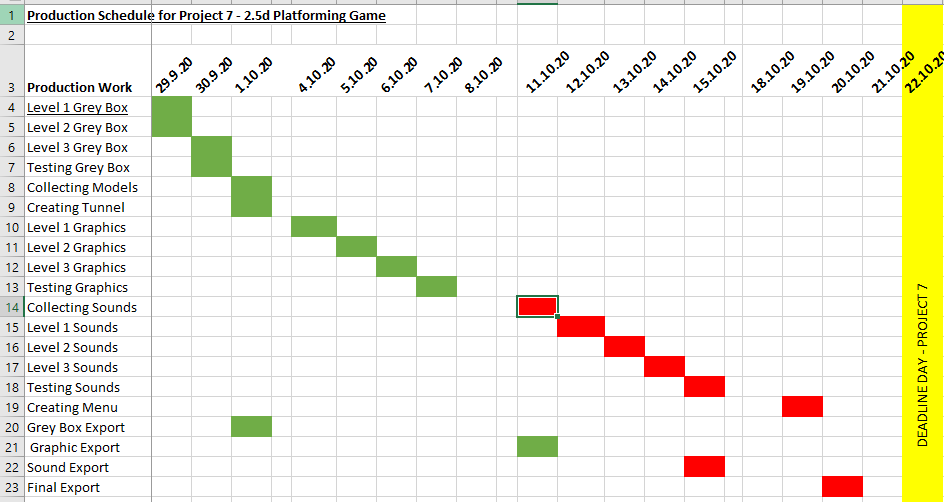
Above is my updated production schedule, as can be seen via the green I am on track to completing my project and so I have not changed the schedule since it seems to be working. I found completing my grey boxing and graphics to be very easy and had little to no issues doing so, I also greatly enjoyed those areas of production. The sound and menu are still red as I have not started those yet and they will stand as a reminder and will help me with time management for the remainder of the project. I have managed to judge my time very well as I am perfectly on track as I have currently exported my graphics build and will be collecting my sounds later today.
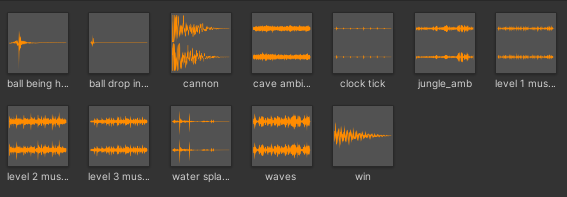
Collecting Sounds
I started to collect my audio using freesound.org, I tried to make sure all the sounds I collected would fit my game and were preferable of the wav file type since they are less compressed so they sound better but for some sounds I had to use mp3 files since that was my only option. Most of my sounds were quite easy to find however some such as the cave ambiance were a little troublesome since it was hard to find something just right but after enough searching I was able to find something I really liked. Some sounds I was unable to find however such as ball collision sounds but if I have time later I will try my best to find some when I’m polishing my game since I currently don’t want to spend any more time as that would start to affect my production schedule. After having collected all my sounds that I could I then imported into unity so that I could start applying them to my game.
Applying Sounds


Next I had to apply the sounds onto the desired objects, I started by adding the music and ambience to each of my scenes which I did so by adding the sounds to the scenes in the hierarchy, I then made it so they looped incase the player stayed long enough on the level. I then had to change the volume and priority until both sounds were loud enough that the player could hear them but also had to make sure you could hear both pieces of audio. I then later went back and did the same for my main menu after I added that. I also had to make sure that I kept the spatial blend at 2D since I wanted it to be at the same volume throughout the entire level.

I added in my victory sound for when the player gets the ball in the hole, I did so by adding another trigger above my level load trigger and added the script so it that played a sound sound when the ball fell into the hole which I then set to the victory sound I had gathered. Next I changed the priority to 0 which meant it was the highest priority sound since it was hard to hear over the games music.
As can be seen in my planning there are other sounds that I wanted however the tutorial I used did not work and with other more important things such as my itch pages presentation that still needed doing I decided to just get my victory, music and ambience in my game since they are the core audio elements of my game.
Main Menu
I also created a main menu since it would make my game seem more professional, I did so by following the guide provided as well as the script had used for changing holes. First I build the main menu itself using the prefabs I had already imported and used. While basic I believe it worked as a nice looking menu. I then added the script in and made it so on space pressed it goes to hole 1. I then set up the UI, I did so by adding a canvas then a panel that was a child of it and then a button that was a child and lastly two texts that were also children of the button. I made one text say press space to start and the other say the name of my game, I then had to increase the font size since by default it was very small


I later encountered some issues after exporting my menu as it would appear a lot darker than it did in unity, so since I had other things to work I tried a quick and easy fix of adding a bit of directional lighting which worked quite well and while I could have spent more time making the lighting look better since as mentioned I had other things I needed to do and it was only my menu which the player wont spend too much time on I decided to leave it how it was.

Updated Production Schedule

Above is my updated production schedule, once again I am on track to completing my project and so I have not changed the schedule since it seems to be working. I found implementing my sound to be easy and had no problems. The final export is all I have left to do since making a main menu was quite a bit easier than I had imagined. I have managed to judge my time very well as I am perfectly on track as I have currently exported my sound build which gives me enough time to add some polish to my game and finish any outstanding work for my blog.
Updated Production Schedule

Above is my final production schedule, as can be seen from it I have now finished my production with 2 days left to do write up any outstanding or improve existing work. I am quite surprised that I managed to get everything done on time since it was a very rough estimated schedule.
