Event Sheet
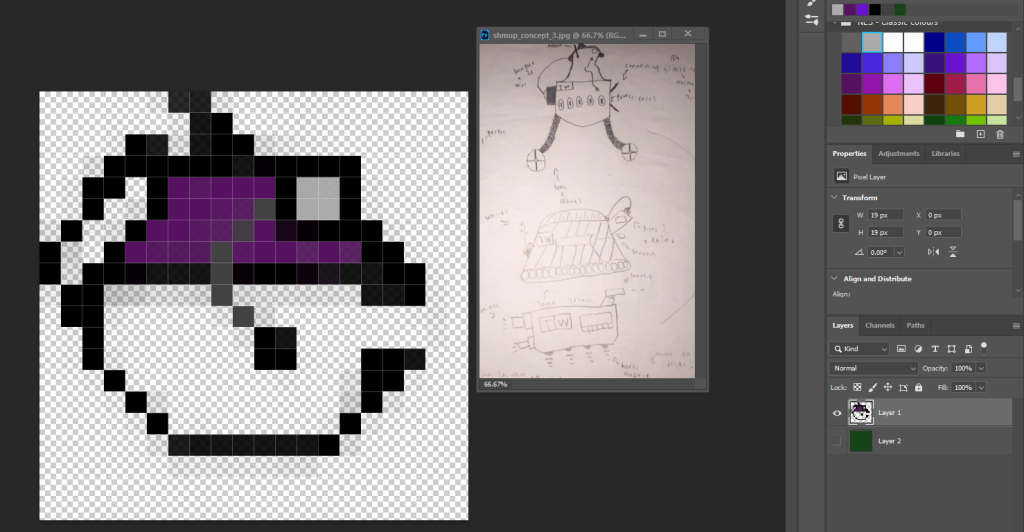
Before I could start coding I created all the sprites I would need to make a basic demo of my game and gave them all the required behaviors and instances variables for example I had to give my player health, shield, energy and armour variables and give the projectile the bullet behavior. Below are the sprites I had to create.When creating the sprites since it was only a demo I might move them around for the final product,I placed the UI on the top of the screen with health, shield and energy on the left and score on the right.I put the player below the UI on a different layer and then put my basic enemy in front on the player in a line so that I could quickly test my code for my enemy to make sure it would work because it would be similar to that of the code for my other enemies.I also put my first few power ups near the start so that I could quickly test that they worked.

Code
When I was creating the demo for my shmup the first thing I coded was the movement as its the most important part of the game. Below is the code I used to create functional movement using the analog stick of a controller. It was very easy to create and I encountered no issues.The code makes it so that when the analog stick in moved in a direction the player avatar moves in that direction too.

Next I coded the player being able to shoot, I coded it so that when a set button(B) is pressed the player creates a bullet that fires from the player towards the direction they are facing, the energy part of the code was added later on when I had implemented my energy system, the code prevents the energy from going into negatives which caused the player to gain energy once it reached 0 which was an issue until I added this.The code means that when the player presses B when the weapon variable is 0 and the player has energy then a bullet is spawned on the player and will shoot towards the right and will take 10 energy from the the player variable energy.

The code below is for my 2nd weapon that the player gets from a powerup, its the same code expect it fires a different sized projectile which I did by using animation frames.This was my first time using animation frames but I got the hang of it quickly so I didn’t find it difficult at all.The code means that when the player presses B when the weapon variable is 1 and the player has energy then a bullet is spawned on the player and will shoot towards the right however the bullets animation frame will be set to 20 so that it will look different and will take 10 energy from the the player variable energy.

The next thing I coded was to prevent bullets from building up off screen which would cause lag.This code was very simple to write.The code basically means that once the bullet goes off the stage it is destroyed.

After that I created the code for my first pickup which gave the player health upon touching the pickup.Adding health was easy as I just needed code that added a set value to the variable of the players health.This code means that when the player touches the health pickup then it adds 50 to the players health variable.

I did similar code for all other pickups/powerups for example the energy pickup and weapon pickup, The weapon pickups change a global variable when the player touches it, which then allows another line of code to work because of the variable.


Next I created the code that makes my enemies shoot their own bullets which I set to every 0.5 seconds as that fire rate worked quite well for my game.The only issue I had was the enemy bullet spawning the wrong way which I solved via the code below this.

Then I made this line of code so that the enemy bullets fired the correct way because they didn’t shoot in the correct direction before.This code means that when an enemy bullet is made its angle is changed to 180 degreees.

The next thing I coded was code so that the enemy bullet did damage to the player which required 2 separate pieces of code. One piece of code is for damage when the player has shield(so it damages the shield) and the other is when their is no shield left(so it damages the health instead).At first trying to think about how I would go about doing this worried me as I had never done something like this but once I started to look at it simpler(as I was overthinking it) I quickly released I could just add a condition that meant the code would only work if their was some shield to take and if their wasn’t then it would take health.


The next line of code was so that the UI updates for when the player takes damage, loses energy and allows the screen to auto scroll. The way the scrolling works is that there is a sprite that has the bullet behaviour and so at the start shoots toward the other end of the layout and this code means the screen follows that sprite as it goes towards the other end of the screen which creates scrolling.This code means that the screen will scroll towards the scroll box every tick and that the player health, shield and energy will be updated to what it should look like.

After that I coded it so that once the players health reaches 0 that player is destroyed and the game is reset.This was similar to some code from my pong game so since I had done it before it was easy to do.

Similarly I coded it next so that if the player goes off the top or bottom of the screen they die.

I then created a rudimentary way of capping the health and energy at 100,looking back I probably could have coded it better and so might improve that when I have time to polish up the game by fixing bugs and improving things.Looking back on this I probably could have done this code better but since this is only the second time I’ve used construct to make something this was the only way I knew to make a limit.This code means that once health or energy go above 100 they get set back to 100.

Like before I had to code it so that the other enemy bullets dealt damage so I used an altered version of the previous enemy bullet code as seen below.

The next thing I did was make it so that the player could kill enemies and it would add a number to the score, I later added it so that it gave energy back as I preferred that method of energy regeneration over my previous way even though it was something I hadn’t thought about before.I didn’t encounter any problems with the code and it worked as intended. This code mean that for each enemy when the players bullet hit them it would destroy the enemy and add to score, then update the score, destroy the bullet and give the player some energy back.

The next piece of code I created was the penalty for hitting 0 energy, The code below means that while the once hits 0 energy their speed is limited as a punishment this is because it adds a sense of resource management to the game which makes it more challenging and enjoyable.I did have to mess around with the values to get it right and may change them again in the future.

Next I created code so that my enemies would only attack when on screen so that it prevents the player being shot by something they cant see yet which I did somewhat like the idea of in theory but in practice it made the game way too difficult so I added the condition that the enemy must be on screen to shoot to my enemy shooting code.It was easy to do as it was very simple code.

After that I coded it so that bullet that were off screen were destroyed so that it wouldn’t cause my game to lag because of their being loads of off-screen bullets, while I had never personally encountered this issue prior to adding this code it was still a potential issue that I wanted to prevent.When later bullets were added I did this same line of code for them as well.

Next I set up the boss’ health system so that the player can damage and destroy it when they reach the end of the stage.I used variables for the bosses health so it was similar to coding the players health,this allowed me to easily implement a boss with a large sum of health.

I added some more code for energy regeneration as I found myself running out a lot and also with my previous method(which I kept still) you could get softlocked, so to prevent that I added this energy regeneration system.

I also made it so once the energy goes above a certain threshold the players max speed returns to normal, as with the players speed being capped so low it made the game way to difficult so I added this to fix that balancing issue.It was very easy to code as it was similar to my code that slowed the player down.

Next I created code for my double laser weapon which I found quite difficult at first because the player would shoot it but it would turn invisible however I fixed the problem by adding more animation frames which resolved the issue.The code means that when the player presses B when the weapon variable is 2 and the player has energy then a bullet is spawned on the player on animation frame 40 which changes the bullets appearance and will shoot towards the right and will take 10 energy from the the player variable energy.

After that I created code for my final weapon the tri-shot and since it was a new bullet I had to code it do deal damage as well, the code is seen below and for the damage I repeated the tri1 code but just swapped tri1 for tri2 or tri3. The tri-shot took awhile to get correct as I had to find the angle I wanted for the bullets to fire and then since it fired 3 bullets I had to compensate for its strength by weakening it against the boss and slowing the bullets speed in properties.The code means that when the player presses B when the weapon variable is 3 and the player has energy then 3 bullets are spawned on the player and will shoot towards the right at different angles and will take 15 energy from the the player variable energy.To create the tri-shot I original used a different line of code that spawned the same bullet 3 times from different image points on the player however I couldn’t get It to work so I changed the code entirely into the one seen below.


Next I coded my 2 armour that give the player permutation power ups for the rest of the stage.It was surprisingly easy to implement as once again I was overthinking things.This code means that when armor1 is set to 1 then health starts to regenerate permanently and when armor 2 is set to 1 then energy regeneration starts permanently.

Next I created code for the player hitting the the obstacles in their way that they must dodge.This code means that when the player collides with it then some health is taken away.

Lastly I coded my pause menu I had some problems at first because I forgot to make the last 2 lines of code sub-events which caused the pause text to flicker on and off constantly however I fixed it with no issues. The code means that when start is pressed the game stops and the pause text is set to visible and then when the game is unpaused the game starts and the pause text is set to invisible.

Overall the coding was very fun and easy to do as I have learnt a lot about construct 3 since coding my pong which has greatly assisted me in coding my shmup.
Later I came back and added in more code for my boss to make it more challenging by firing a spread of bullets.The code means that the boss spawns a bullet every 0.7 seconds and then the next time it does the angle is increased till it hits a value and then it starts to lower again to make an up and down bullet spread.At first I did have some issues with this code however it was only because I had set the groups the wrong way round.

I later came back and added a simple victory screen to the end of my level, The code below moves some text that says victory onto the end of the stage after the player kills the boss.


I also added a line of code so that if the player touches the boss they die since players could just go through him.

From creating my shmup I have learned a lot so next time I will be even better at coding and hopefully make less mistakes than I did this time.
Artwork
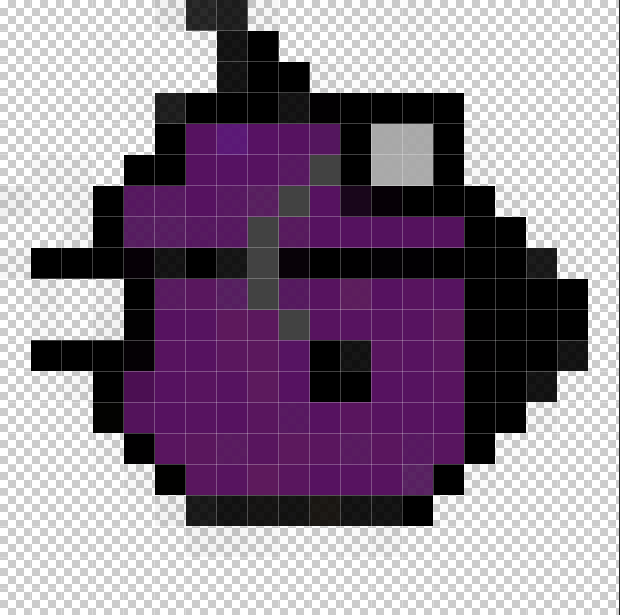
The first thing I designed was my player avatar, overall I found it a bit hard at first but once I got into it it was very easy and quite fun to create.
The second thing I created was my roof enemy since it was just a blob it was very easy to create and ended up looking just how I wanted it to.
Afterwards I made the powerup graphic which once again was simple
The next thing I made were my enemies,My first 3 enemies were easy to do however the final enemy took quite a while as I struggled to get started on it as it was the boss so I wanted it to look good and distinguishable as a boss.


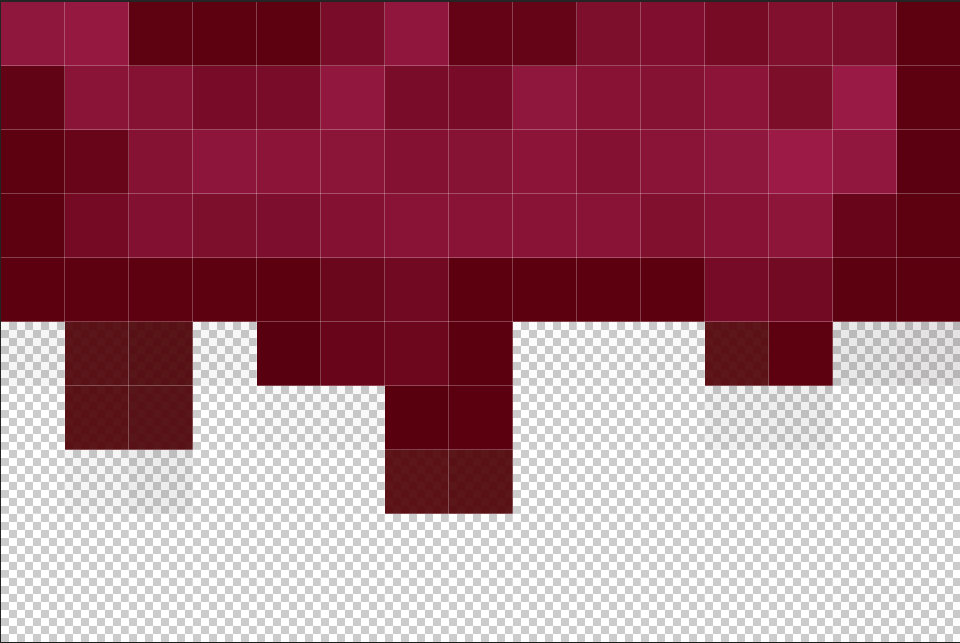
This is my background since its simple as its just a wall, I will make more sprites to put on the background to add detail.

This is one of the sprites I will put on my background to add detail,Its a sign for the building.The version I am using is not what I intend as I was going to polish it up and fix the outline however I liked it with the Rough outline more so I kept this design.

Above is a failed design for a background element,I scrapped it because players could confuse it for an enemy which could lead to unfair deaths however I did like its design.

Above is a warning sign I will put before the boss as a warning and background element,I didn’t intend for the cut corners however I liked it so kept it.

Here is another background element that is meant to be some sort of exposed wires,I created them quick and easily as its a simple design.

Here is a laser gate that I have put in the background to add detail.

Above is what I will use for my parallax background,Its a pillar that will scroll faster than the background to show movement for effectively and because it was a rectangle it was easy to make.I used several layers to create parallax however only 2 of the layers were for the parallax, the back layers was the background itself and the details I added to it and the pillar layer was the pillars that scroll in front of the camera to add depth and the other 2 layers are for the game itself.


Above is a reactor I made that I didn’t end up using because I didn’t like how it looked in game, as it just didn’t look right compared to everything around so I scrapped it.
My games background and background elements are quite simple however it helps bring the players attention to the enemies which is what I intened to do so on that front I have succeeded.

Lastly I made the obstacles that are attached to the top and bottom of the stage it was easy to make as once again it was a simple design.

Here is an image of my game with all my artwork in it,All the graphics mesh pretty well together and nothing looks too out of place.
Overall my graphics have improved since the last project and I was more confident in myself when creating the graphics so I found it easier to do however I did still struggle when creating some of the graphic but it wasn’t as much as the last project,An example of this would be my background since I found it hard to design a detailed background since it was just a corridor which is why I then later came back and produced graphics to put onto the background to add some detail to it. Next time I would do more detail overall on my graphics however since most of them are simplistic it creates a nice art style for my game which I quite like.
Once all my graphics were done I had to do animation
The first thing I animated was my player

I used piskel to animate the players engine however since I was working with a small space I had to make something basic as I couldn’t really fit a detailed explosion and since I have little experience in animating a sprite I couldn’t really make anything as detailed as I would have liked.

After I finished animating the player I exported the animation as a spritesheet so I could put it into construct 3.

Next I imported it into construct as an animation strip for when the player is moving right and I reverse it when they move left.

The next player animation I made was for moving up which was animating the hover modules from my production art.I then did the same as my other animation and saved it as a sprite sheet and imported it into construct.

Next I animated the boss blinking which was quite simple to do and then I did the same process of getting it into construct.


For animating my 3rd enemy I made it grow and shrink by adding another animation frame in construct and changing its size and then looping the animation which was very easy to do and added a nice but simple animation to my enemy.

The next animation I did was my explosion which I found hard to do since I’m not good at art but I eventually settled on a design I liked an used that, I then did the same process of putting it into construct.
When creating my animation for my game I was a bit worried since I had only ever done very basic moving an image animation and had never used piskel however once I started the task I found it quite easy and quickly became confident in my ability to create the animations. Next time I would try to do some slightly more complex animations that what I have done this time.
Sound
The last thing I needed to add to my game was the sound, I got my sounds from freesound.org. It was quite easy to find sounds that would fit my game and so didn’t take very long as I had no problems.Once I had gotten all my sounds I imported them into Construct by double clicking the layout and adding audio in,after that I put them into the sounds folder and since all my sound files were wav files I encountered no issues with the sound quality of them.

Next I had to make the sounds play in my game when I wanted them too such as making it so that when the player presses B after it fires the bullet it players the correct sound effect and then I had to set the volume to a fitting level and make sure the sound didn’t loop. In order to find the fitting level for the audio I had to play my game multiple times till I found the right level of volume.Some sounds I needed to be louder than others such as the boss’ scream and other that would be heard more frequently to be quieter so they weren’t distracting or annoying such as the attack sound and explosion.

When Implementing my sound I had no problems which allowed me to get the task done quick and easy.I believe I have made a good choice in my selection of audio as it fits together quite nicely which will help add to the experience of my shmup. Overall the task was fun and easy and had no negatives, I would have liked to have made some of my sounds myself however since I have no experience doing so I chose not to however next time I would try to make some of my own sounds for my game.
Player Feedback
I received some player feedback about my game which will allow me to know what aspects of the game were good and which aspects needed improving.
The first part of the feedback was the originality of the theme and players responded very well with both 4 and 5 stars for the originality, I believe this is because shmups are usually space themed with alien ships whereas mine was a science facility theme with escaped creatures which hasn’t really been done before and so it is a pretty original idea.
The second part of the feedback was the graphics of my game which were not received as well, however I got an average of 4 stars still. It was a mix of reception as I got a mix of 3’s, 4’s and a 5.It is better than the last project however it is clear that my artwork is something that I still need to work on, I believe that the reason why the feedback is a bit mixed is due to some of my graphics being pretty good and others being not as good because for example my enemy design turned out really well however other things such as the background and boss are a little less polished in comparison hence why the feedback is a bit of a mixed bag.
The third part of the feedback I received was sound which I got all 1’s because the demo I had up on itch.io when the feedback was being given did not have the sound in it yet which means I don’t really have any feedback on the sound that I then later added into my game which would have been good to know, as I would have known if what I chose was good and fit the game.
The last part of the feedback I received was the mechanics which I received an average of a 3 which is about what I expected as while I have added in some good mechanics with my multiple different weapons, power ups, teleporting enemies and energy system as well as a pause screen none of them really went too in depth with anything and were moderately basic and I could have done more but unfortunately I had a bit of a creative block when trying to think of some more mechanics.
I also received some comments about the game on a whole and most people seemed to enjoy it and mention how difficult it was which was my intention but it came up a lot so while it is still hard I have slowed the enemy fire rates to make it more manageable.
